Pygame-Workshop
Pygame Workshop!
Learn how to create games with Python by creating your first basic game with Pygame!
- The Prelude - What is Pygame?
- Getting Started
- Setting up our Dinobro
- Stumped - Collision and Obstacles
- Acknowledgements
The Prelude
What is Pygame?
Pygame is a open-source library that streamlines the process of drawing images and shapes to a display! What that means is that unlike game engines (or applications that allow you to build games), Pygame does not have its own physics system or lighting systems.
What is interesting about this is that it gives us as programmers a ton of control about the systems that make up our game! It also is very easy to get started with, free, and open-source! Open-source means that all of the code that is running behind the scenes is publicly available meaning that the developers will never be able to charge money for Pygame and the community can always choose to take the code and make their own versions!
Above is the source code for Pygame publicly available on Github!
What is this workshop?
In this workshop we will learn the basics of Pygame by making our own version of the offline Google Dinosaur game!
Let’s get started!
Installing Pygame
Make sure before getting started to install pygame by running the following command in your terminal! This will just install the pygame library so we can import it in our python files.
pip install pygame
Getting Started!!
To get started lets open a new python file and you can call it whatever you want. You can copy this skeleton code into your file to get started. Don’t worry if it looks complicated we are going to step through every line and learn what is happening!
import pygame

def main():
    # pygame setup
    pygame.init()
    screen = pygame.display.set_mode((768, 432))
    clock = pygame.time.Clock()
    running = True

    # MAIN GAME LOOP
    while running:
        # poll for events
        # pygame.QUIT event means the user clicked X to close your window
        for event in pygame.event.get():
            if event.type == pygame.QUIT:
                running = False

        # fill the screen with a color to wipe away anything from last frame
        screen.fill("purple")

        # flip() the display to put your work on screen
        pygame.display.flip()

        # limits Frames Per second displayed to 60
        clock.tick(60)

    # Close pygame and clean up resources
    pygame.quit()


if __name__ == "__main__":
    main()
After running the code your program should display a purple screen! So whats going on here? Lets step through every line. In the following lines of code, we are importing the library and initializing everything we are going to need to run our program. First we need a screen to display our game on, and set_mode lets us pick the size of the window. The clock will be used to make sure that the game behaves the same regardless of what computer we run the program on, some computers display faster or slower than other computers. We will later use the clock to ensure that those speeds do not effect our physics. Lastly running will be a boolean thats true or false depending upon if our game is running our not!
import pygame

# pygame setup
pygame.init()
screen = pygame.display.set_mode((640, 480))
clock = pygame.time.Clock()
running = True
These next lines of code are the “game loop”. What that means is that while the game is running, we are going to iterate through this loop constantly until that is no longer true. The first thing that happens in our loop is that it checks if the user has sent a quit event, this happens when a user clicks the close button on the window, if we do that we stop the loop. If a user didnt close the window, we set the color of the window to purple, and call flip to push all of our changes to the screen to the computer monitor. We call clock.tick(60) every time in the game loop to insure that every second we pass through this loop 60 times, or we update the screen 60 Frames per second. The clock also returns the time since the last update to the screen which we will later use like I mentioned before.
while running:
    # poll for events
    # pygame.QUIT event means the user clicked X to close your window
    for event in pygame.event.get():
        if event.type == pygame.QUIT:
            running = False

    # fill the screen with a color to wipe away anything from last frame
    screen.fill("purple")

    # flip() the display to put your work on screen
    pygame.display.flip()

    clock.tick(60)  # limits FPS to 60
The last line outside the game loop just closes the program and cleans up all the resources used by pygame!
pygame.quit()
Nothing from this program should look too foreign to you, its all things that you have learned by learning Python just using a new library. Now using our Python knowledge and some other library functions we can change the background to something cooler!
Surfaces && Changing up the Background
Before we continue and setup the background its critical to learn about Surfaces in Pygame. Surfaces are the objects in Pygame that are displayed on the screen. When you want to display a picture on the screen, you will load it using the pygame.image.load() function which will return a surface for you to display on the screen. In Pygame, the screen itself is also a type of surface, so in order to put your surface on the screen, you need to use the blit function which is short for Block Transfer.
Heres a picture to help you visualize how this works!
The following code will load a potato image into the surface called “potato” and then copy the contents of that surface to the screen using blit at the location provided in the tuple (0,0).
potato = pygame.image.load("potato_path.png")
screen.blit(potato, (0,0))
In Pygame the coordinate system for drawing to the screen starts in the top left corner of the display and increases in X and Y value as we move down and to the right, like shown in the figure below.
Using all of this information, we can now create a fancy background and floor for our game. In the assets folder of the github repository you can find a bunch of images that I will be using to create the game, you can use your own images but you might need to change the size of your window to fit your backgrounds!
For our game, I have 5 background images that will produce a sense of depth when we are running in our game! In the following code, I setup functions to load all of the images and scale them by 2 to fit our window. I called these functions before the game loop and stored my background surfaces in a list. Similarly, I loaded a floor and also scaled it by 2 and stored it in a variable. Then during the game loop, after I fill the screen with pink, I draw the backgrounds and then the floor.
Pygame gives us some cool functionality like, screen.get_height(), which returns the height of the screen that we can use to find the coordiantes where to draw the floor. You can see me using other functionality like that throughout the code. The only other unfamiliar piece of code is when I called convert_alpha on my surface after loading it. This just ensures that the pixels in the image that are transparent in my original image retain their transparency after being loaded, you typically want to use this when loading pngs!
# load an image with a given path and scale it the given amount and return it
def load_image(path, scale):
    image = pygame.image.load(path).convert_alpha()
    image = pygame.transform.scale(image, (image.get_width() * scale, image.get_height() * scale))
    return image

# setup the background images and return an array with all the background images
# note: the order the backgrounds are loaded in is the order they are loaded in, backgrounds with the most depth first!!!
def setup_backgrounds():
    background_1 = load_image('dino-pygame/assets/background/bg1.png', 2)
    background_2 = load_image('dino-pygame/assets/background/bg2.png', 2)
    background_3 = load_image('dino-pygame/assets/background/bg3.png', 2)
    background_4 = load_image('dino-pygame/assets/background/bg4.png', 2)
    background_5 = load_image('dino-pygame/assets/background/bg5.png', 2)

    return [background_1, background_2, background_3, background_4, background_5]

# setup the floor
def setup_floor():
    floor = load_image('dino-pygame/assets/background/floor.png', 2)
    return floor

# draw the backgrounds in the given array to the screen in a loop
def draw_backgrounds(screen, backgrounds):
    for background in backgrounds:
        screen.blit(background, (0,0))

# draw the floor to the screen at the bottom of the screen
def draw_floor(screen, floor):
    screen.blit(floor, (0,screen.get_height()-floor.get_height()))
After adding this code, calling the setup_backgrounds() and setup_floor() before the game loop and draw_backgrounds() and draw_floor() functions in the game loop, and running the script we will now see a much prettier background with our layered fauna and colorful grassy floor!
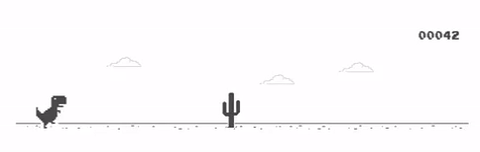
Setting up our Dinobro
Now that we have a fancy backgrounds, lets add our character into our game. The character sprite we are going to be using is in the same assets folder of the github repository as before in the character subfolder!
The first thing we are going to do is pretty similar to the work you did in Homework 9. We are going to setup a class for our dinosaur that will encapsulate all of the functionality it will do such as drawing it, updating the position and velocity, and changing the sprite for when we are running or jumping! You can copy this class into your code and read through it to understand how it works!
class Dino:
    # intialize the surfaces for each of the states - run 1 and run 2 are used to make it look like the dinosaur is running
    def setup_dino(self):
        self.dino_idle = load_image('dino-pygame/assets/dino/dino_idle.png', 4)
        self.dino_jump = load_image('dino-pygame/assets/dino/dino_jump.png', 4)
        self.dino_run1 = load_image('dino-pygame/assets/dino/dino_run1.png', 4)
        self.dino_run2 = load_image('dino-pygame/assets/dino/dino_run2.png', 4)

    # return the current surface of the dinosaur depending upon the state
    def current_sprite(self):
        if self.state == "idle":
            return self.dino_idle
        elif self.state == "jump":
            return self.dino_jump
        elif self.state == "run": # we have 2 sprites that make it look the the dinosaur is running with his right and left leg that change every frame!
            if self.running_frame == 1:
                self.running_frame = 2
                return self.dino_run1
            else:
                self.running_frame = 1
                return self.dino_run2

    # get the height of the dinosaur surface
    def get_height(self):
        return self.dino_idle.get_height()

    # get the width of the dinosaur surface
    def get_width(self):
        return self.dino_idle.get_width()

    # draw the dinosaur to the screen
    def draw(self, screen):
        screen.blit(self.current_sprite(), (self.x, self.y))

     # update the position of the dinosaur
    def set_position(self, x, y, is_floor=False):
        self.x = x
        self.y = y

        # if the y we are passing in is the same as the floor, we can set this bool to true and update value
        if is_floor:
            self.floor_y = y

    # call this if jump button was pressed - we can only jump if we are not falling
      def jumped(self):
        if not self.falling:
            self.jump = True
            self.state = 'jump'

    # call this function every frame to update the position and velocity of the dinosaur based on inputs
    def physics(self):
        pass

    # initialize all of the instance variables of the dinosaur
    def __init__(self):
        self.setup_dino()
        self.x = 0
        self.y = 0
        self.floor_y = 0
        self.state = "run"
        self.running_frame = 1
        self.jump = False
        self.falling = False
        self.vel_y = 0
Theres a lot of code here so lets break it down. In our init function, we first setup our dinosaur, which involves just loading surfaces for different states and sprites our dinosaur will be in. Then we setup our x, y, and floor_y variables, set our intitial state to running and the animation frame to 1, our jump and falling booleans to false and our y_velocity to 0.
We also have a bunch of helper functions:
- current_sprite() - Returns the current surface depending upon the state of the dinosaur for drawing purposes. We also update the frame from 1 to 2 or 2 to 1 to make it look like the dinosaur is running with 2 running sprites.
- get_width/get_height() - returns the width/height of the surfaces
- draw(screen) - draws the dinosaurs current surface to the screen at the current x and y position
- set_position(x, y, is_floor) - sets the current coordinates of the dinosaur to the given x and y coords. It also updates floor_y to be the y value passed in if the boolean is True. We will use this later.
- jumped() - Call this function to make the dinosaur jump - we can only jump if we are not falling!
- physics() - This function will be called every frame before draw to update the position of the dinosaur based on the velocity
I additionally, I created some global variables at the top of my code that we might find useful:
DINO_JUMP_VEL = -40 # the dinosaurs jumping height
GRAVITY = 4
DINO_X_OFFSET = 50 # offset from the left edge of the screen
Now that you have your Dinosaur class setup, you can create an instance of the Dinosaur object before the main game loop and set its position to the height of the dinosaur above the floor and some offset from the left of the screen like so:
dino = Dino()
dino.set_position(DINO_X_OFFSET, screen.get_height()-floor.get_height()-dino.get_height(), True)
Draw out this math using the coordinate system I showed earlier if this math doesn’t make sense! I also passed in True to inform the class that this is the floor Y position for the dinosaur (this is the resting position of the dinosaur).
Last thing we need to do to get the dinosaur all setup is to update our game loop to handle keyboard input and to update the physics and draw the dinosuar.
 # MAIN GAME LOOP
    while running:
        # poll for events
        # pygame.QUIT event means the user clicked X to close your window
        for event in pygame.event.get():
            if event.type == pygame.QUIT:
                running = False
            if event.type == pygame.KEYDOWN and event.key == pygame.K_SPACE:
                dino.jumped()

        # fill the screen with a color to wipe away anything from last frame
        screen.fill("purple")

        # draw background and floor
        draw_backgrounds(screen, backgrounds)
        draw_floor(screen, floor)

        # Draw the dino to the screen
        dino.physics()
        dino.draw(screen)

        # flip() the display to put your work on screen
        pygame.display.flip()

        # limits Frames Per second displayed to 60
        clock.tick(60)

    # Close pygame and clean up resources
    pygame.quit()
With all of this, if you run the script again, you should see the dinosaur running on your screen, but if you click the space bar, nothing will happen yet! Lets add jumping next!
Test what happens if we add the following code to our physics function:
 if self.jump is True:
            self.vel_y += DINO_JUMP_VEL
            self.falling = True
            self.jump = False

        if self.falling:
            self.vel_y += GRAVITY

        new_y_position = self.y + self.vel_y
        self.set_position(self.x, new_y_position, False)
Play the game and try to think about what is wrong with it! At the moment, we never check if we have landed and hit the ground. Luckily, we setup some functionality beforehand to allow us to make a check for this.
if new_y_position >= self.floor_y:
            new_y_position = self.floor_y
            self.falling = False
            self.vel_y = 0
            self.state = 'run'
We can simply check if our new position is going to be greater than the Y position of the floor - if it is, we know that we are about to hit the floor and we can just set our Y position to the floor, set our falling variable to False and our velocity to 0. We can also change our state back to run so that we start the running animation again! Once again, if you are confused by this math, draw a picture out to convince yourself how this works.
Try messing around with variables and set your own jump velocity and gravitys to make it feel right!
Stumped
The last feature we are going to add is obstacles and collision! This is going to be the most complicated and important feature so take your time going through this!
Rects and Collision
In Pygame, we can check for collisions by using Rect objects. Rects are exactly what you think they are. They are just boxes with a x and y position of the top left corner and a width and a height. Rects can be used to check for collision using the rect.colliderect() function. How it works is you pass in another Rect into the parenthesis and it determines if there is any overlap of the rectangles like below.
We can add a rectangle to the Dinosaur that has the same position as the dinosaur itself, and the same width and height as the surface. This will be our Dinosaurs collision box. Then we can add Rectangles to our obstacles that we can check if are colliding with the player Dinosaur. If you are confused by how this works, this video by Coding with Russ explains it super easily! It is also what I used to wrap my head around it!
Updating Mr Dino
Ok so like we mentioned lets update our dinosaur by adding a collision Rect to them. We are only going to have to change 2 functions.
# intialize the surfaces for each of the states - run 1 and run 2 are used to make it look like the dinosaur is running
def setup_dino(self):
    self.dino_idle = load_image('dino-pygame/assets/dino/dino_idle.png', 4)
    self.dino_jump = load_image('dino-pygame/assets/dino/dino_jump.png', 4)
    self.dino_run1 = load_image('dino-pygame/assets/dino/dino_run1.png', 4)
    self.dino_run2 = load_image('dino-pygame/assets/dino/dino_run2.png', 4)

    # instantiate the collider rect with the default position and the width and height
    self.collider_rect = pygame.Rect( 0, 0, self.get_width(), self.get_height())

# return the dinos collider rect
def get_collider_rect(self):
    return self.collider_rect

# update the position of the dinosaur
    def set_position(self, x, y, is_floor=False):
        self.x = x
        self.y = y

        # update the collider rect with the new position
        self.collider_rect.topleft = (x, y)

        # if the y we are passing in is the same as the floor, we can set this bool to true and update value
        if is_floor:
            self.floor_y = y
First we just create a collider_rect that is the same position as the default position (0,0) and has the same width and height as our dinosaur. Then we add a function to return that collider rect so that it can be accessed outside of the dinosaur and lastly we need to make sure we update the position of the collider rect every time we move the dinosaur. If we don’t update the collider when the dinosaur moves, the hitbox is not going to align with the visual representation of the dinosaur D:
Thats all we have to update here!
Obstacle Class and Inheiritance
Just like Homework 9 again, we are going to use object orientated programming to setup our Obstacle class and any other classes that want to inherit from it. In the future, if we want to add new obstacles it will make it easier to get started!
So first lets create our base class for our obstacles.
# base obstacle class
class Obstacle:
    def __init__(self):
        self.x = 0
        self.y = 0
        self.x_vel = 0

        # collider rect is pretty much a box around the object that represents where it can be hit
        self.collider_rect = pygame.Rect(0,0,1,1)

        # if a obstacle is active it is on the screen, otherwise its inactive and can be despawned
        self.active = True

    # update the positon of the obstacle and collider
    def set_position(self, x, y):
        self.x = x
        self.y = y
        self.collider_rect.topleft = (self.x, self.y)

    # return the collider rect
    def get_collider_rect(self):
        return self.collider_rect

    def draw(self, screen):
        # Should be overridden by subclasses
        pass

    def physics(self):
        # Should be overridden by subclasses
        pass
For our init function we just instantiate a bunch of the variables we are gonna use like the position, the x-velocity since all the obstacles will be coming from the right of the screen, our collision rectangle and one more variable for whether or not the object is active or not. This is going to be used to despawn our objects when they are off the screen on the left so they don’t continue to take up memory after they are no longer being used.
We additionally have some other functions that look similar to the ones we saw in the Dinosaur.
We are now going to create a class that inherits from this Obstacle class called Stump, that will draw Stump objects to the screen using the asset in the assets folder of the github repository that we used before.
 stump class - inherits from obstacle and uses the stump asset
class Stump(Obstacle):
    def setup_stump(self):
        self.stump_sprite = load_image('dino-pygame/assets/obstacles/stump.png', 2)
        # setup the collider rect with the width and height of the stump
        self.collider_rect = pygame.Rect( 0, 0, self.get_width(), self.get_height())

     # get the height of the stump surface
    def get_height(self):
        return self.stump_sprite.get_height()

    # get the width of the stump surface
    def get_width(self):
        return self.stump_sprite.get_width()

    # draw to the screen
    def draw(self, screen):
        screen.blit(self.stump_sprite, (self.x, self.y))

    # set position and collider position
    def set_position(self, x, y):
       self.x = x
       self.y = y
       self.collider_rect.topleft = (x, y)

    # stump just moves left - also check if its off screen for setting inactive
    def physics(self):
        new_x_pos = self.x + STUMP_VEL
        self.set_position(new_x_pos, self.y)

        if new_x_pos < 0 - self.get_width():
            self.active = False

    # return the collider rect
    def get_collider_rect(self):
        return self.collider_rect

    # call obstacle init and setup the stump
    def __init__(self):
        super().__init__()
        self.setup_stump()
This also looks pretty similar to what we have seen before with the only note that we are deactivating the object after it passes off screen in the phyiscs method. We are also using another global variable I created for the stumps velocity!
# velocity the stump moves to the left
STUMP_VEL = -15
The Obstacle Handler
Theres going to be a lot of obstacles on screen. A common practice in game development is to create manager objects or an object that handle the behavior of a lot of other objects, such as enemies, particles and obstacles!
We are going to replicate that same behavior in our game by creating a Obstacle Handler class that will utilize a bunch of stuff we have seen over the course of this semester!
# Obstacle handler class that spawns, despawns, and checks for collisions with obstacles
class ObstacleHandler():
    def __init__(self):
        self.obstacle_classes = [] # this is a list of the classes of obstacles it can spawn!
        self.obstacles = [] # list of the current existing obstacles
        self.time_to_next_obstacle = pygame.time.get_ticks() + random.randint(OBSTACLE_SPAWN_RATE[0], OBSTACLE_SPAWN_RATE[1]) # time until the next obstacle spawns

    # add an obstacle class to the list of possible obstacles
    def add_obstacle_class(self, obstacle_class):
        self.obstacle_classes.append(obstacle_class)

    # spawn an obstacle - called every frame, checks clock to see if we have passed time for next obstacle
    def spawn_obstacle(self, clock):
        if pygame.time.get_ticks() >= self.time_to_next_obstacle:
            # update the next obstacle timer
            self.time_to_next_obstacle = pygame.time.get_ticks() + random.randint(OBSTACLE_SPAWN_RATE[0], OBSTACLE_SPAWN_RATE[1])
            if len(self.obstacle_classes) > 0:
                new_obstacle_class = random.choice(self.obstacle_classes) # chose a new random obstacle
                new_obstacle = new_obstacle_class()

                # set its position to be on the floor - the + 5 is just to make sure it lines up nicely
                new_obstacle.set_position(SCREEN_WIDTH + new_obstacle.get_width(), FLOOR_HEIGHT - new_obstacle.get_height() + 5)
                self.obstacles.append(new_obstacle)

    # draw all the obstacles
    def draw_obstacles(self, screen):
        for obstacle in self.obstacles:
            obstacle.draw(screen)

    # update the physcis for all the obstacles
    def obstacles_physics(self):
        for obstacle in self.obstacles:
            obstacle.physics()

        # if a obstacle is off screen we set it to inactive - we remove all the ianctive obstacles from the list and they despawn
        self.obstacles = [o for o in self.obstacles if o.active]

    # check if an objects collider rect has collided with any of the obstacles collider rects
    def check_collisions(self, object_collider_rect):
        for obstacle in self.obstacles:
            # collide_rect returns true if a collision occurs between 2 rects
            if object_collider_rect.colliderect(obstacle.get_collider_rect()):
                return True

        return False
Lets step this all slowly so we understand everything. The obstacle handler is going to have a list of all the classes that it can spawn. That list is the obstacle_classes list and we are going to add the Stump class to that list. It’s also going to have a list of all the obstacles that are on the screen or were recently spawned. Lastly its going to have a variable that stores the time until the next obstacle should spawn using random.randint on a range I specified in the global variables:
# the interval at which obstacles can spawn in MS
OBSTACLE_SPAWN_RATE = [500, 1500]
pygame.time.get_ticks() returns the current time in milliseconds and we can add some random amount of time to that to signify when we should next spawn an obstacle. For example, if we create the obstacle handler at time t = 0 and want to create obstacles every 500 MS, we can add 500 MS to 0 and wait until pygame.time.get_ticks() returns 500 to know that we have reached the time to spawn an obstacle.
We see how this is used in the spawn_obstacle function. This function should be called every frame in the game loop and checks if we are ready to spawn a new obstacle. If so, it sets the next obstacle spawn time, checks if there are types of obstacles for us to pick from, uses random.choice (like Homework 5!!) to pick an obstacle from the list, create an object of that object class and then set the posiiton given the screen width and floor height, global variables I set up at the top of my file.
# DIMENSIONS OF THE SCREEN
SCREEN_WIDTH = 768
SCREEN_HEIGHT = 432

# the height of the floor on the screen
FLOOR_HEIGHT = 0
I later edited FLOOR_HEIGHT in main the global keyword like below:
 # global lets us edit globally created variables - we are editing the FLOOR_HEIGHT at the top of the file to be used when spawning objects
global FLOOR_HEIGHT
FLOOR_HEIGHT = screen.get_height()-floor.get_height()
Back to our obstacle_handler, add_obstacle_class pretty much does what it says, it lets us add a class of an object to the list of potential object classes to spawn. The draw_obstacles function iterates through all the obstacles in our list and draws them on the screen given using the obstacles own draw function. The obstacles_physics function iterates through all the obstacles and calls their physics functions like draw_obstacles. Additionally, it checks if any of the objects in the list have been deactived and if so, it removes them from the list. This pretty much deletes the objects from memory since the list is the only thing referencing each object!
Our last function in our Object Handler is check_collisions. This function takes in a collider rect of another object, in our case this will be the dino, and it iterates through all the obstacles and checks if there are any collisions between them and the dino’s collider rect. If so, the function will return true and false otherwise.
Back to the beginning
All we have to do is put it all together now. Lets go back to our main function add in our obstacle handler and add the stump to the classes like below:
# create the obstacle handler and add the stump as one of the classes that cna be instantiated
obstacle_handler = ObstacleHandler()
obstacle_handler.add_obstacle_class(Stump)
Then we just have to call all the obstacle handlers functions, like spawn_obstacles, obstacle_physics, and draw_obstacles in the game loop and pass in the appropriate variables. I will let you figure ou the finishing steps :)
After you have obstacles drawing to the screen and moving lets add in this code and see what happens:
 if(obstacle_handler.check_collisions(dino.get_collider_rect())):
    print("Hit!")
You should see hit printed every time the dinosaur hits a stump now!!
You can also change it to the code below:
 if(obstacle_handler.check_collisions(dino.get_collider_rect())):
    running = False
Now everytime you hit a stump, the game will stop.
Congrats!
You have officially made it through the tutorial and made your first game in Pygame! I learned everything I used in this tutorial using the classes resources and the Pygame documentation as well as this awesome video by DaFluffyPotato on YouTube.
If anything didn’t work for you, you can always check out my source code available on the GitHub page where all the other assets are!
Interested in learning more about game development? This is how I made the same game using the Godot Engine - a free, open-source, lightweight game engine that runs on any computer and is perfect for beginners!
Acknowledgements
This workshop was created by Jake Torres for students in ENGI1006 Spring 2025
Heres where the assets we used are from:
- Parallax Background - https://jesse-m.itch.io/jungle-pack
- Dinosaur - https://arks.itch.io/dino-characters
- Tree stump - https://free-game-assets.itch.io/free-swamp-2d-tileset-pixel-art